If you find yourself mounted by your opponent, you’re in a very bad position. Your opponent has a lot of control over your body, and it can be difficult to escape. However, the bridge and roll escape is a simple yet effective technique that can help you get out of this position and turn the tables on your opponent.
Establish Proper Position
Before attempting the bridge and roll escape, you need to establish proper position. First, make sure your opponent is mounted on you properly, with their knees on the ground and their weight on your chest. Next, place your hands on your opponent’s hips to maintain control and prevent them from shifting their weight.
Bridge Up
To execute the bridge and roll escape, you need to create space between yourself and your opponent. Start by bridging up, lifting your hips off the ground and pushing your opponent’s weight up and back.
Shift Your Hips
Once you’ve created enough space, shift your hips to the side opposite of the arm that is closest to your opponent’s head. For example, if your opponent has their left arm closest to your head, shift your hips to the right.
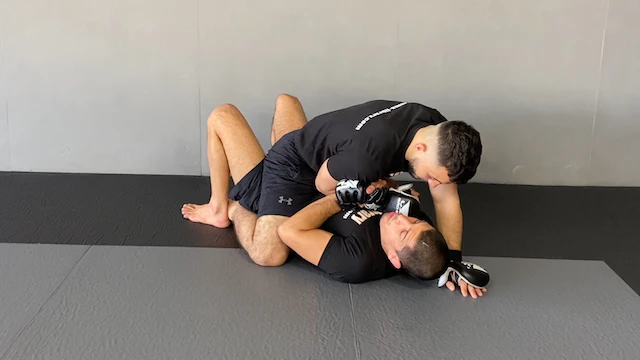
Trap Your Opponent’s Arm
As you shift your hips, reach up with your opposite arm and trap your opponent’s arm that is closest to your head. This will prevent them from using it to post and maintain their balance.
Roll OVer Your Shoulder
With your opponent’s arm trapped, continue rolling over your shoulder and onto your stomach. Your opponent should roll off of you, allowing you to get back to your feet or take a dominant position.
Regain Guard
Once you’ve escaped the mount, it’s important to establish a strong guard to prevent your opponent from mounting you again. Work to regain your guard by placing your feet on your opponent’s hips and controlling their posture.
The bridge and roll escape from mount is a simple yet effective technique that can help you escape a bad position and turn the tables on your opponent. With proper technique and practice, you can use this escape to get out of the mount and regain control of the fight.